This feature is available only for unique-domain, corporate Prey clients. In order to set-up Prey (your Service Provider, or SP) to log-in via SSO, you need to have an Identity Provider (IdP; such as OneLogin, Okta, Azure AD, etc) in order to pass on login credentials to Prey, and your Prey login credentials must have a unique domain (sorry, @gmail.com users!)
This guide will help you find the information you need to pass on to your IdP; please note that you will need admin privileges both for Prey and your IdP, and all set-up processes will vary depending on your IdP. Prey only manages the information provided by your IdP; if you have any inconveniences during the process, contact your IdP for support.
In order to execute certain actions, such as lock and disk encryption, users need to have a valid Prey password, independent of their SSO credentials. If the user was created via Prey, then no further action is needed. If the user was created by your IdP, please create a password for them in the Users, roles and permissions section, in the Settings tab. You can review which users were created by your IdP in that section's user list, under the SAML column.
To help your organization keep all your log-in credentials centralized in a Single Sign-On provider (SSO), you can set-up Prey to log-in via SAML with any Identity Provider. To set that up, please follow this quick step-by-step guide:
Find the values you need to pass on to your IdP
In your Prey panel, go to the Settings tab, and then click on SAML. There, you'll find the Audience URI and the Postback URL, as highlighted in the screenshot below:
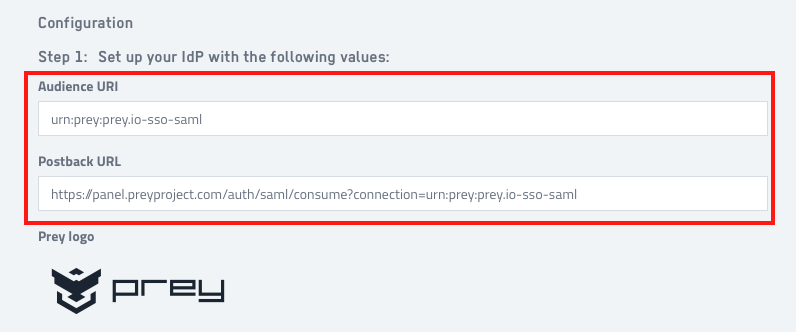
Copy and paste those attributes to the corresponding configuration in your IdP portal.
Find the SSO URL and X.509 Certificate in your IdP portal
Copy the SSO URL to the field highlighted below:
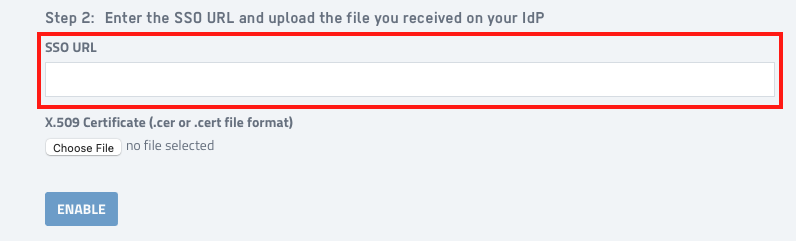
And then upload the X.509 Certificate provided by your IdP in the space below, using the Choose File button - after the certificate is uploaded, click on Enable.
Set up SSO authentication
After you enable the SSO authentication, you'll be taken to the set-up screen. There, you can toggle SAML on or off, and force SSO authentication, admins included.
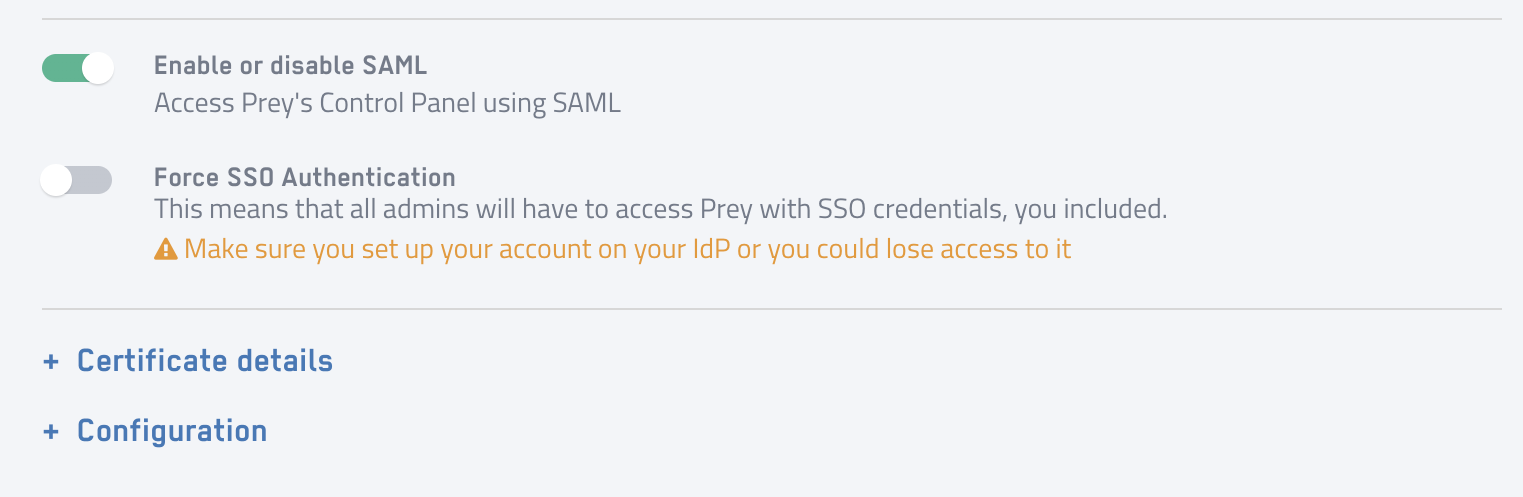
If you toggle Force SSO Authentication, as an admin you will be logged out and required to log-in using your IdP, so please make sure you set up your IdP account beforehand. If you click in Certificate Details, you will be shown the X.509 certificate uploaded from your IdP, while the Configuration section will show you the same information you passed on to your IdP to enable SAML.
And that's it! With this, your Prey account is now more secure than ever, and fully compliant with your organization's security policies.